Eclipse and Bndtools
What You Will Learn in this Section
In this section we will go through the support Eclipse provides to help you develop bundles with maven. It shows how to use the Bndtools editors for the bnd and bndrun files as well as how to debug your code.
It is assumed you have setup your Eclipse and installed Bndtools. You can look at the Quick Start how to setup your environment. M2Eclipse is generally already installed in Eclipse.
Though we need to install Bndtools for this section, we only use the editors standalone. You should not make the projects Bndtools projects.
M2Eclipse
If you use Maven and Eclipse then M2Eclipse is the best solution for OSGi enRoute development. It allows you to create an Eclipse workspace with projects that can reside anywhere on the file system.
This tutorial clearly cannot teach M2Eclipse, there are other sources for that.
The bnd Editor
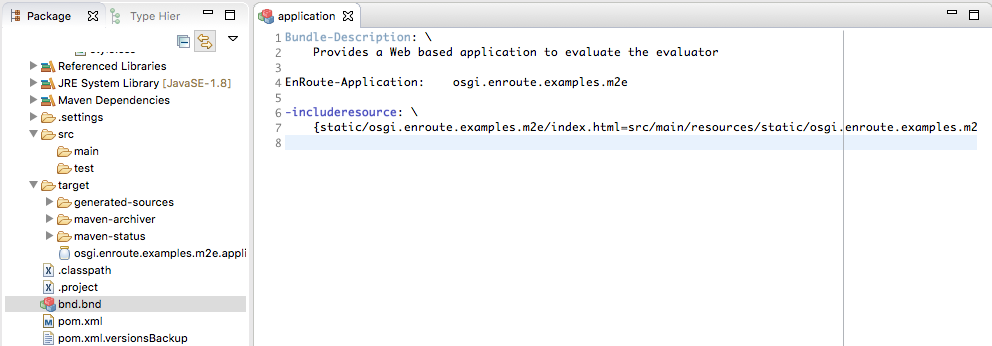
If you double click on a bnd file then it will open a bnd editor when Bndtools is installed in Eclipse. The most important tab on this editor is the Source tab. This editor provides syntax coloring and completion as well as tool tips on instructions and headers. An important function of the bnd editor is to notice when you use spaces after a backslash that was intended to be used as a line ending. The editor will recognize many error situations and warn you early.
The Content Tab and the Description tab are mostly working when used in stand-alone mode. In the Content tab, the imports will not be calculated if the bnd.bnd does not reside in a Bndtools project. However, you can still drag packages to the Private-Package or Export-Package list and/or customize imports.
The Build, Run and Test tabs are only working in Bndtools projects.
The JAR Viewer
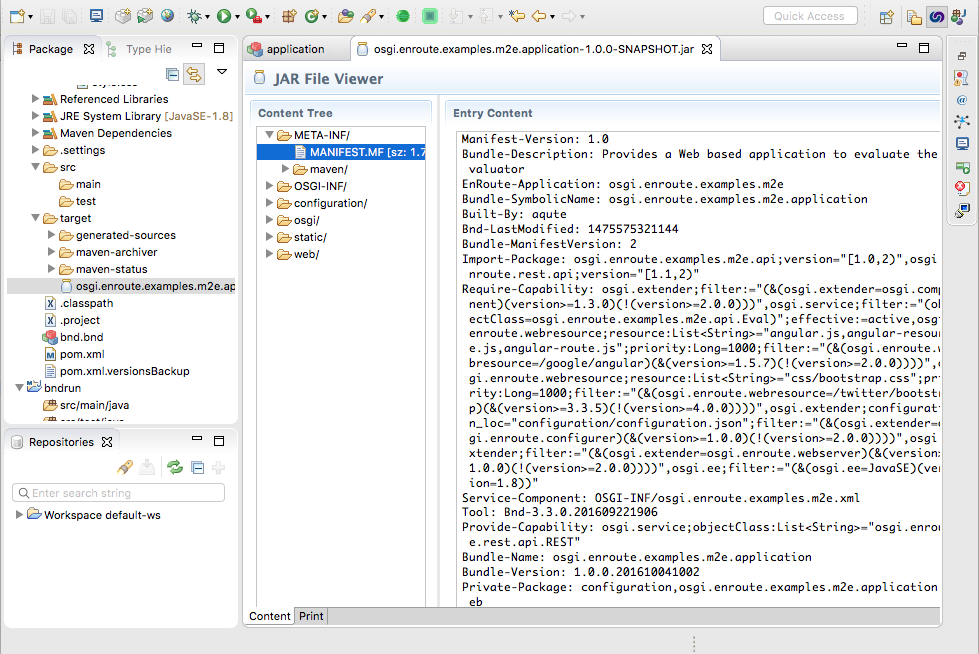
If you double click on a JAR file then you will open by default the Bndtools JAR editor. This editor has a Content and a Print tab.
The Content tab is a list of the content. You can browse the manifest and other files.
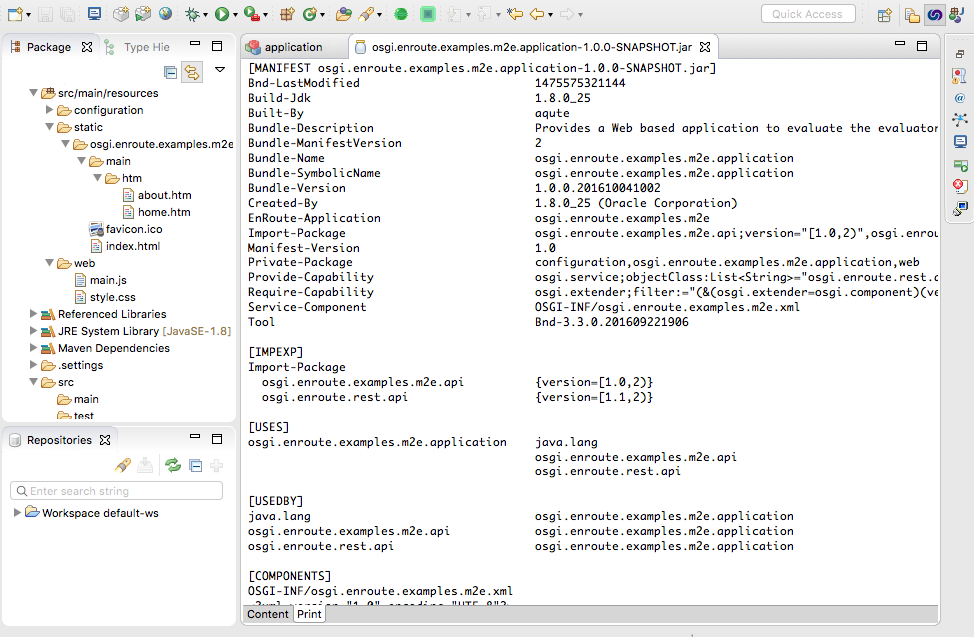
The Print Tab is the output of an analysis by bnd. It shows the manifest information and DS information in more detail and more readable form.
The Resolution Viewer
If you open the Resolution view (Window/Show View/Bndtools/Resolution) then
it will track the selection. If you select a JAR file it will analyze this
JAR file and show the capabilities and requirements in a more readable form than
is used in the manifest.
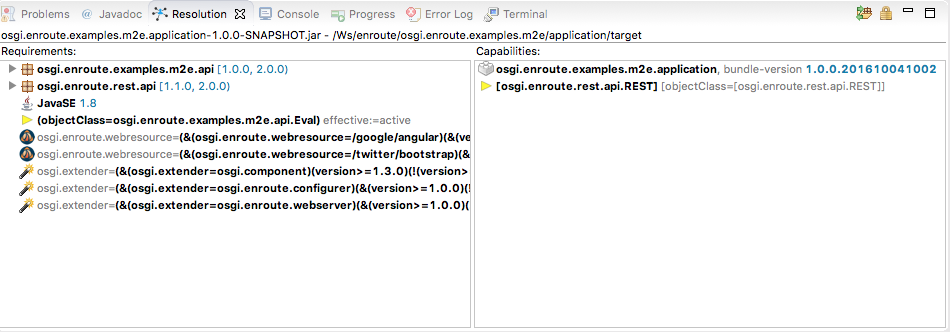
Especially useful are the packages requirements. You can see the import range that was calculated but also by opening up these lines you can see the classes that caused that requirement.
The Bndrun Editor
The Bndrun editor has two tabs. First there is the source tab. This tab is basically the same as the bnd editor. It provides completion, highlighting and detection of errors when you create malformed properties.
The Run tab is another beast, it can be very useful for editing the bndrun
files because it shows the possible dependencies. These dependencies can be
filtered and with drag and drop added to the -runrequires instruction.
With a button click, this list can then be resolved. The resolution can then
be inspected to handle optionals (these are listed seperately) and to analyze
where certain bundles come from.
The Bndrun editor can also launch the application standalone or in the debugger. This does not support dynamic update for code changes, you still have to install the project before you see the updates.
Resolving
If you double click on the osgi.enroute.examples.eval.bndrun file in the bndrun
directory then you open the Bndrun editor. You should select the Run tab.
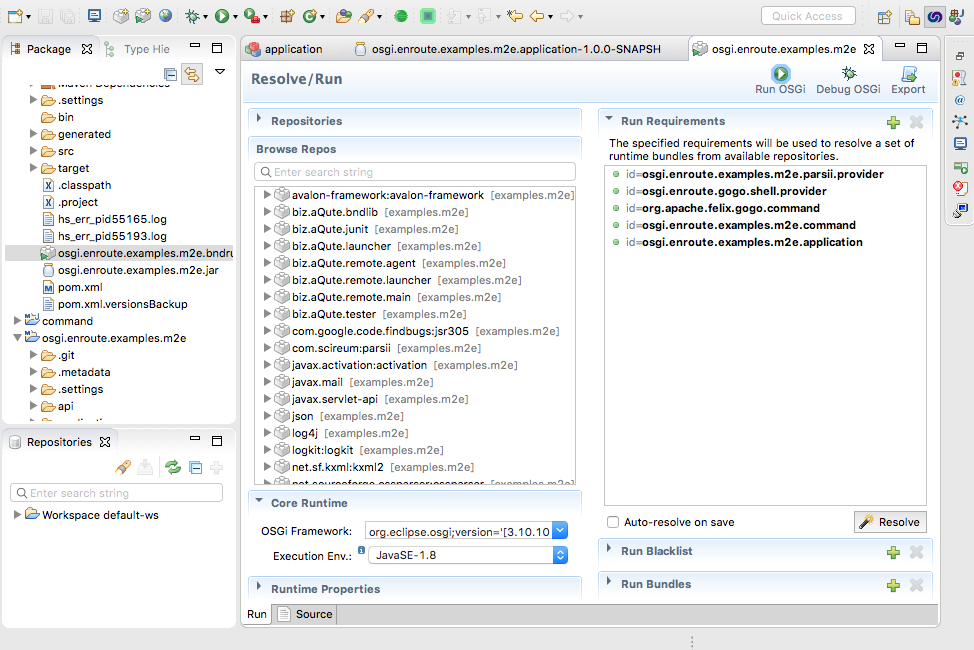
The list of bundles you can see in the Browse Repos list is calculated from the
pom.xml file in the bndrun directory. (This is the Bnd Pom Repository plugin
definition.) You can drag bundles in this list and drop them on the Run Requirements
list.
The parsed result is saved in the target/cache.xml file
to speed things up. Changes in the pom.xml are detected but if you make more
overall changes you should clean the project with maven to remove the cached
file because these changes cannot be detected.
Below the Browse Repos list you can set the framework, the execution environment
and the runtime properties. This should be self explanatory.
Once the initial requirements are set you can click on the Resolve button.
This will open a window (sometimes after some time) with the resolution:
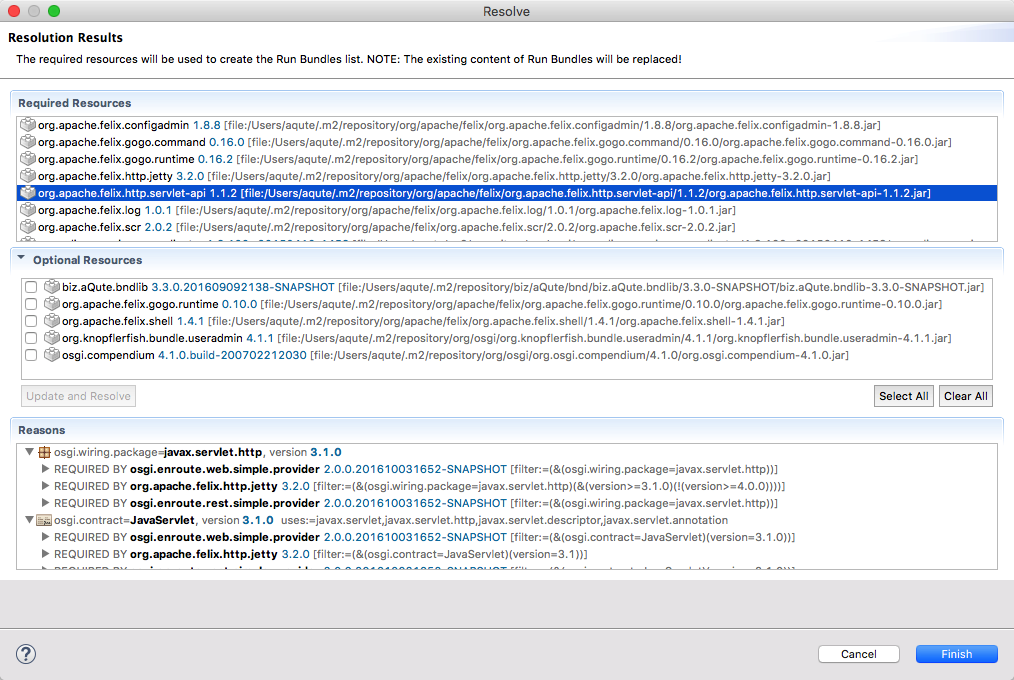
The result shows the required resources based on the initial requirements in the top list. It then shows any optional resources. These are resources that are included because the resolution is ok without them but some resources could use them. You can select the desired resources and then update and resolve.
When you select a resource in the top list, the bottom list shows an explanation why that resource is included. That is, what resources required it.
When you click Finish the -runbundles list is updated and the bnd.bnd file
is saved.
This works considerably faster and is more elegant than running mvn install,
get the new -runbundles and update the bndrun file. However, it does require
Eclipse.
Debugging
On the right top of the Bndrun editor in the Run tab there are three buttons:
Run OSGi– Launch the application.Debug OSGi– Launch the defined application in the debuggerExport– Export the application to an executable JAR with all its dependencies
M2Eclipse continuously compiles and runs some of the plugins but will not
JAR the result. This means that you need to do a mvn install to update the
bundles in the ~/.m2/repository. When you run your framework with support
of the Bndrun editor then you should be aware that Eclipse updates your code
in the VM when you change the source but it does not create a new bundle. The changes
you see are also only for the class files. It will not see updates to the
resources. This is a very different experience from Bndtools that synchronizes all
the updates continuously.
This means that if you’re working in Eclipse you have to be quite aware of the state of the different projects. In general, after you’ve made a change you should do a full clean install of that project.
When you install, the Maven JAR plugin overwrites the existing file. This can cause a core dump in the JVM.
Prev
