Testing the Provider with (Standard) JUnit
What you will learn in this section
In this section we will create a whitebox JUnit test for our provider implementation. JUnit tests are very cheap; using them extensively saves tremendous amount of times in later phases of the development process. JUnit tests are always run before code is released and when they fail, they prohibit the release of the project.
Testing is one of those chores a developer has to do, not as much fun as some deep algorithmic code. However, it is likely one of the most effective ways to spend your time.
JUnit
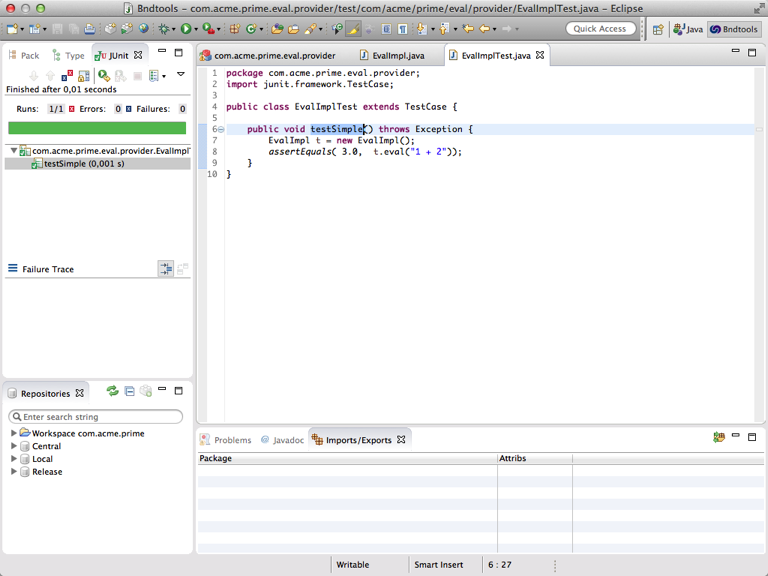
A provider should always have unit tests. Unit tests are white box tests. The test knows about the implementation details and it can even see aspects of the components that are not part of the public API. The OSGi enRoute template already added a test case for us in thetest directory. This EvalImplTest test is placed in the same package as the EvalImpl class but will never be part of the bundle. However, during test it is in the same package so it can actually see package private information in the EvalImpl class; this is awfully useful during testing. Again, these are white box tests.
So let’s evaluate a simple expression:
package com.acme.prime.eval.provider;
import junit.framework.TestCase;

public class EvalImplTest extends TestCase {

	public void testSimple() throws Exception {
		EvalImpl t = new EvalImpl();
		assertEquals( 3.0,  t.eval("1 + 2"));
	}
}
Now, when I learned flying in a retractable gear plane, my teacher told me that there are two kind of retractable gear pilots. The first category is the pilots that have landed the plane with gear up and the second category is for the pilots that have not yet landed their planes with gear up. Something like this is going to happen to you when testing in bndtools. In this case you must use the standard Eclipse JUnit test after selecting the test class or method: @/Run As/JUnit Test. Undoubtedly, there will be many times when you select the Bnd OSGi Test Launcher (JUnit) which we will discuss later. So select the EvalImplTest class and do @/Run As/JUnit Test.

Obviously, this test beats the implementation in its simplicity! Nice exercise for the reader (you always hate those as well?)
To run JUnit tests you can select the project, the test folder, a package, a class, or a method and call up the context menu and then @/Debug As/JUnit Test. It will then run all tests selected beneath that level.
Debugging
Since most code does not run the first time, we need to debug as well. You can set a breakpoint by double clicking in the margin where you want the breakpoint to happen. A blue dot then appears. Just select the test method you want to run and do @/Debug As/JUnit Test.
The JUnit pane has many buttons that allow you to rerun tests, an incredibly powerful tool.
How Does it Work?
The JUnit runner will create a new VM with the build-path as class-path. That is all your test dependencies must be on the build-path. It will then run your tests. You can either use:
- JUnit 4.x – JUnit 4 requires annotations on the test class. Do not extend TestCase in your class because then the annotations are ignored.
- JUnit 3.x – JUnit 3 test cases must extend TestCase. This is usually the easiest way to write tests.
Prev Next
